Friday, December 17, 2010
Fix 0x80240030 Windows Update Error (Proxy Setting)
What causes Error 0x80240030
# Incorrect character exists in the proxy override settings.
# A misconfigured Proxy/Firewall can cause this problem.
# You are trying to access Windows Update using VPN. The website and Automatic Update may not function properly.
# The corporate environment does not have autoproxy implemented.
To try and resolve the error 0x80240030, use the following tips... After each tip test to determine whether the issue is resolved.
Resolution Suggestion One:
# Remove invalid characters from the proxy exception list and then clear the proxy cache.
1. Open Internet Explorer.
2. On the Tools, select Internet Options.
3. Click on the Connections tab.
4. Click on the LAN Settings.
5. Click on the Advanced button.
6. Please delete any entry in the Exceptions section.
Next, clear your proxy cache.
1. Click on Start, and then click Run.
2. Type cmd in the Open box to get a DOS prompt.
3. Type proxycfg -d at the command prompt, and press Enter.
4. Type net stop wuauserv at the command prompt, and press Enter.
5. Type net start wuauserv at the command prompt, and press Enter.
6. Now try the site again.
-----------------------------------------------
Resolution Suggestion Two:
# Reconfigure or update your firewall program.
Double-check the Proxy/Firewall settings. Add the following urls to the exception list within your Firewall/Proxy:
http://*.windowsupdate.microsoft.com
https://*.windowsupdate.microsoft.com
http://download.windowsupdate.com
For help configuring Proxy/Firewall refer to documentation or contact the manufacturer.
-----------------------------------------------
Resolution Suggestion Three:
# VPN and Proxy.
You are trying to access Windows Update using VPN. The website and Automatic Update may not function properly.
Autoproxy is not picking up the wpad.dat proxy configuration file to determine the proxy to be used for the target URL. Thus we are going with no proxy!
1. Try to access Windows Update while not using VPN connection.
2. Use the proxycfg tool to specify a proxy server to use (proxycfg.exe -p
-----------------------------------------------
Resolution Suggestion Four:
# Run proxycfg to tell WU about your proxy.
The corporate environment does not have autoproxy implemented.
Automatic Update will always do autoproxy detection and thus if that returns no proxy, it will try to use no proxy. Use the proxycfg tool to specify a proxy server to use (proxycfg.exe -p
-----------------------------------------------
Resolution Suggestion Five:
# OnSpeed Software.
A further solution may be to exit OnSpeed (a compression tool to speed up Internet connections) if installed. Disabling the program does not appear to work BUT fully exiting it completely does...
...or try this setting:
Onspeed> settings> features> use browsers Proxy exclusion setting.
Tuesday, October 19, 2010
RSS 2.0 vs Atom 1.0
This week's lecture is about jQuery and RSS. Since I've done a lot of jQuery in my project, let's talk about RSS. I've already used RSS since my bachelor (so around 4-5 years). I use RSS to get Manga update, read news, and get Android update (because I've got a new toy called Samsung Galaxy S). The RSS client I use is Opera (browser). I personally like Opera more than any RSS client such as Mozilla Firefox (browser) or Thunderbird. As a browser, Opera has mail client as well.
There is an alternative RSS standard called Atom. The following is a good comparison quoted from http://blog.webreakstuff.com/2005/07/rss-vs-atom-you-know-for-dummies/. According to the comparison, Atom wins most of the battles.
Examples of RSS & Atom:
There is an alternative RSS standard called Atom. The following is a good comparison quoted from http://blog.webreakstuff.com/2005/07/rss-vs-atom-you-know-for-dummies/. According to the comparison, Atom wins most of the battles.
1. While RSS has two main publishing protocols, Atom has one standardized approach. This waives off some of the interoperability issues between using both the Blogger protocol and MetaWeblog (the two protocols for RSS publishing). Best approach: Atom


2. When it comes to required content on a feed, Atom is much more restrictive, needing more data in order to be valid. RSS has a more loose approach. This has generated some discussion: ultimately, I like how Atom requires “last update” timestamps, but I like how RSS isn’t as restrictive to be standard. Best approach: Both have their strong side


3. RSS requires escaped HTML or plain text, while Atom allows for other forms of data. This increases human-readability of an Atom feed, even though it complicates the publishing process (because you have to specify the kind of data you’re publishing). Best approach: RSS (assuming that a feed is meant for automated consumption – human readability is a task for the reader or aggregator)


4. Atom clearly distincts partial content from excerpts, while RSS doesn’t. This clearly makes a difference, because there’s no way to know when an item on an RSS feed is a full story or an excerpt (that requires loading the original page in order to continue reading). Best approach: Atom, clearly.


5.Auto-discovery is standardized in the Atom specification, whereas in RSS there have been several ways to discover feeds, to this date. Best approach: Atom even though it is not a grave situation for RSS.


6. Aggregating and extracting content is one of the most important issues, and the one that clearly gives Atom an advantage. RSS allows content only inside a single monolithic rss document including several entries. Atom on the other hand allows for single Atom Entry documents, that make syndicating, aggregating or reusing single entries of a feed a much easier process. Best approach: Atom
Examples of RSS & Atom:
RSS 2.0
<?xml version="1.0" encoding="utf-8"?>
<rss version="2.0">
        <channel>

                <title>Example Feed</title>
                <description>Insert witty or insightful remark here</description>
                <link>http://example.org/</link>
                <lastBuildDate>Sat, 13 Dec 2003 18:30:02 GMT</lastBuildDate>
                <managingEditor>johndoe@example.com (John Doe)</managingEditor>

                <item>
                        <title>Atom-Powered Robots Run Amok</title>
                        <link>http://example.org/2003/12/13/atom03</link>
                        <guid isPermaLink="false">urn:uuid:1225c695-cfb8-4ebb-aaaa-80da344efa6a</guid>
                        <pubDate>Sat, 13 Dec 2003 18:30:02 GMT</pubDate>
                        <description>Some text.</description>
                </item>

        </channel>
</rss>
Atom 1.0
<?xml version="1.0" encoding="utf-8"?>
<feed xmlns="http://www.w3.org/2005/Atom">

        <title>Example Feed</title>
        <subtitle>Insert witty or insightful remark here</subtitle>
        <link href="http://example.org/"/>
        <updated>2003-12-13T18:30:02Z</updated>
        <author>
                <name>John Doe</name>
                <email>johndoe@example.com</email>
        </author>
        <id>urn:uuid:60a76c80-d399-11d9-b93C-0003939e0af6</id>

        <entry>
                <title>Atom-Powered Robots Run Amok</title>
                <link href="http://example.org/2003/12/13/atom03"/>
                <id>urn:uuid:1225c695-cfb8-4ebb-aaaa-80da344efa6a</id>
                <updated>2003-12-13T18:30:02Z</updated>
                <summary>Some text.</summary>
        </entry>

</feed>
Saturday, October 16, 2010
Future Web Experience
I found this video when trying to relax my brain after studying for Contemporary Telecommunications. The video shows the Aurora ( Mozilla-Lab's concept ) and many future web applications that will WOW you...
Check this out...
Check this out...
Tuesday, October 5, 2010
jQuery plugins that I use on my project
To make life easier, I use some jQuery plugins to do my project website.
Note: I recommend that if you use jQuery as your Javascript library, don't use other Javascript libraries like prototype and scriptaculous. It may burden the users to load the scripts eventhough they have fast connection. Just stick with one Javascript library.
Find the alternative plugins that use your Javascript library.
For example: Lightbox 2 use prototype and scriptaculous as its main framework. If you use jQuery, you can use jQuery.lightbox.
There are 2 plugins that I wanna discuss:
1. FancyBox
A tool for displaying images, html content and multi-media in a Mac-style "lightbox" that floats overtop of web page. It was built using the jQuery library. Licensed under both MIT and GPL licenses. You can find the example on http://fancybox.net/.
It is a very good plugin and very easy to use when you want to make a picture gallery with decent animation. In my opinion, it's better than jQuery lightbox, because it can display html content and multimedia, not limited to image.
2. jShowOff
jShowOff is a jQuery plugin for creating a rotating content module. Basically, it's a great tool for making a slideshow of your pictures. It has nice effects and easy to implement.
Happy coding...
Week 9 Practice: Database
This week's challenge is not so hard, just basic queries that we might use on our project.
The challenge:
1. Use the INSERT command to create a couple of new books in the table
2. Use the SELECT command to find all books whose title begins with W
3. Use the SELECT command to find all books whose price is less than 10
4. Use a LIMIT clause on a SELECT command to just list the first two books
5. Use both LIMIT and ORDER BY in a SELECT command- which one happens
first? (hint: use ORDER BY bookid LIMIT 2)
If you wanna try the query, just go to http://www.w3schools.com/sql/sql_tryit.asp. Note: LIMIT clause doesn't exist on the website
The answer:
1. For number 1, you can copy and then modify the value of the following query.
INSERT INTO books (title, author, isbn, cost)
VALUES ('Managing Enterprise Content', 'Barry Liu', 363562425127189, 57)
2. SELECT * FROM books WHERE title LIKE 'W%'
3. SELECT * FROM books WHERE cost<10
4. SELECT * FROM books LIMIT 0,2 or SELECT * FROM books LIMIT 2
note: 0 means the starting row (the row starts with 0). 2 means how many records we want to
get from the starting row.
5. SELECT * FROM books ORDER BY bookid LIMIT 2.
The query shows the first 2 records of books table after it's sorted by its bookid,
Tuesday, September 21, 2010
Week 8 Challenge: Javascript
This week's challenge is about JavaScript. Specifically, it's about a Date() function to how many days old you are and pop up this value in an alert box on an html page as it opens. Find out the codes below...
<!DOCTYPE html PUBLIC "-//W3C//DTD XHTML 1.0 Transitional//EN" "http://www.w3.org/TR/xhtml1/DTD/xhtml1-transitional.dtd">
<html xmlns="http://www.w3.org/1999/xhtml" xml:lang="en" lang="en">
<head>
 <title>My Blog</title>
 <meta http-equiv="content-type" content="text/html; charset=iso-8859-1" />
 <script type="text/javascript">
  //Reference: http://www.javascriptkit.com/javatutors/datedifference.shtml
  function calcDate()
  {
  var today = new Date();
  var mybirthday = new Date(2010, 9, 5); //month is 0-11 in Javascript

  //Set 1 day in milliseconds
  var one_day=1000*60*60*24;

  //Calculate difference btw the two dates, and convert to days
  alert("You are "+Math.ceil((today.getTime()-mybirthday.getTime())/(one_day))+" days old!");
  }
 </script>
</head>
<body onload="calcDate()">
</body>
</html>Wednesday, September 15, 2010
Week 7 Practice Challenges
There are 2 challenges this week:
1. Using PHP database functions
2. Regular Expression using PHP
Find the codes below...
For the first challenge, you just need to:
1. Add field to input form (line 274 -275)
2. Add column to the database (done using MySQL)
3. Modify code to update the column from the field (line 134, 139-141, 180, 243, 248, 250)
4. Display the country of the guest. (line 55, 60-64)
Second challenge:
If you don't know about Regular Expression, go to http://www.regular-expressions.info/tutorial.html to get better understanding how Regular Expression works.
PHP has a function that performs a regular expression match called preg_match.
The challenge is to check whether the number entered is a valid Australian number and whether it's a mobile or land line number.
Regular expression for valid Australian phone number can be found on http://regexlib.com/REDetails.aspx?regexp_id=66. You can also copy the regex from the code below.
1. Using PHP database functions
2. Regular Expression using PHP
Find the codes below...
For the first challenge, you just need to:
1. Add field to input form (line 274 -275)
2. Add column to the database (done using MySQL)
3. Modify code to update the column from the field (line 134, 139-141, 180, 243, 248, 250)
4. Display the country of the guest. (line 55, 60-64)
<!DOCTYPE html PUBLIC "-//W3C//DTD XHTML 1.0 Transitional//EN"
"http://www.w3.org/TR/xhtml1/DTD/xhtml1-transitional.dtd">
<html xmlns="http://www.w3.org/1999/xhtml" xml:lang="en" lang="en">
<head>
<meta http-equiv="Content-Type" content="text/html; charset=utf-8"/>
<title>Guestbook</title>
</head>
<body>
<script language="JavaScript" type="text/javascript">
function checkGB()
{
if ((document.forms.myGB.name.value == '') || (document.forms.myGB.message.value == ''))
{
alert('Fill in required fields!');
}
else {
document.forms.myGB.submit();
}
}
</script>
<div align=center>
<strong>::Guestbook - A::</a></strong><br>
</div>
<?php
/******************************************************************************/
/* HERE WE DEFINE OUR GUESTBOOK CLASS */
/******************************************************************************/
class Guestbook {
var $result; // Main query result;
var $count_result; // Count query result;
var $dbc; // Database connection;
var $total_entries; // How many records in database;
var $table = "guestbook"; // Guestbook table;
/* LET'S CONNECT TO OUR DATABASE */
function connect_db($server, $database, $user, $password)
{
$this->dbc = mysql_connect($server, $user, $password) or die ("Connection failed!");
mysql_select_db($database) or die ("Database failed!");
}
/* DISPLAY RECORDS */
function display_records($offset, $entries_per_page)
{
$this->result = mysql_query("SELECT id, name, email, message, date, country FROM $this->table ORDER BY id DESC LIMIT $offset, $entries_per_page") or die ("Query failed!");
while ($row = mysql_fetch_array($this->result)) {
// SOME NICE FORMATTING HERE;
$display_name = nl2br(htmlspecialchars($row["name"]));
$display_email = nl2br(htmlspecialchars($row["email"]));
$display_country = nl2br(htmlspecialchars($row["country"]));
$display_message = nl2br(htmlspecialchars($row["message"]));
// THIS ALLOWS USING SMILIES AND IS NOT DANGEROUS;
$display_message = str_replace ("<img src=smiles/", "<img src=smiles/", $display_message);
$display_message = str_replace (">", ">", $display_message);
// DISPLAY WHAT WE HAVE AT LAST;
echo "<hr>Name: <b>[" . $display_name . " ]</b>, <i>" . $row["date"] . "</i><br>" . "Email: <a href=mailto:" . $display_email . ">" . $display_email . "</a><br>Country: ". $display_country ."<br>" . $display_message;
}
/******************************************************************************/
/* This code here handles pages stuff, number and next/previous links, etc. */
/* If you don't need some of the features, just delete corresponding parts. */
/******************************************************************************/
$this->count_result = mysql_query("SELECT count(id) AS number FROM $this->table") or die ("Query failed!");
while ($count = mysql_fetch_array($this->count_result)) {
$total_entries = $count["number"];
}
// HOW MANY PAGES OF RECORDS WE HAVE;
// THIS BLOCK IS ESSENTIAL FOR FURTHER PARTS;
$pages = $total_entries / $entries_per_page;
if ($pages < 1) {
$pages = 1;
}
if ($pages / (int) $pages <> 1) {
$pages = (int) $pages + 1;
}
else {
$pages = $pages;
}
if (($offset > $total_entries) or (!is_numeric($offset)))
$offset = 0;
// CURRENT PAGE NUMBER;
$pagenow = ($offset/$entries_per_page + 1);
echo "<div align=center><br>* * *<br>Page " . $pagenow . " of " . $pages;
// NEXT/PREVIOUS PAGE LINKS DISPLAY
$next = $offset + $entries_per_page;
$previous = $offset - $entries_per_page;
if ($pages <> 1) {
echo " || ";
if ($previous < 0) {
echo "<a href=gb.php?offset=" . $next . ">";
echo "<acronym title='Next " . $entries_per_page . " records'>>>></acronym></a>";
}
elseif ($next >= $total_entries) {
echo "<a href=gb.php?offset=" . $previous . ">";
echo "<acronym title='Previous " . $entries_per_page . " records'><<<</acronym></a>";
}
else {
echo "<a href=gb.php?offset=" . $previous . ">";
echo "<acronym title='Previous " . $entries_per_page . " records'><<<</acronym></a>";
echo " | ";
echo "<a href=gb.php?offset=" . $next . ">";
echo "<acronym title='Next " . $entries_per_page . " records'>>>></acronym></a>";
}
echo "</div><br>";
}
// DISPLAY LINKS TO ALL PAGES SEPARATELY;
echo "<div align=center>Pages: ";
$i = 0;
while ($i < $pages) {
$ri = $i + 1;
$showpage = $i * $entries_per_page;
if ($ri == $pagenow)
echo $ri . " ";
else
echo "<a href=gb.php?offset=" . $showpage . ">" . $ri . "</a> ";
$i++;
}
echo "</div>";
}
/******************************************************************************/
/* End of pages code, this section is the longest, but you get pages features */
/******************************************************************************/
/* ADD RECORDS TO DATABASE */
function add_record($name, $email, $message, $smilies="on", $webmaster, $message_length, $language_filter, $bad_words, $country)
{
if ($email == "") {
$email = "no_email";
}
if ($country == "")
{
$country = "-";
}
// IF LANGUAGE FILTER IS ENABLED AND WEBMASTER EMAIL ADDRESS DEFINED DO THIS;
if (($language_filter == 1) and (strlen($webmaster) <> 0)) {
for ($i=0;$i<sizeof($bad_words);$i++) {
if ((strstr($name, $bad_words[$i])) or (strstr($email, $bad_words[$i])) or (strstr($message, $bad_words[$i]))) {
$warningmessage = "Name: " . $name . "\nEmail: " . $email . "\nMessage: " . $message;
@mail($webmaster, "Bad language in the guestbook", $warningmessage);
}
}
}
// IF THERE ARE LIMITS ON MESSAGE LENGTH CUT IT TO DEFINED LIMIT;
if ($message_length <> 0) {
$message = substr($message, 0, $message_length);
}
// IF USER USES SMILIES DO THIS;
if ((isset($smilies)) and ($smilies == "on")) {
$format_smilies = array (
":-)", "<img src=smiles/icon_smile.gif alt=\'Smile\'>",
"8-)", "<img src=smiles/icon_smile_8ball.gif alt=\'Glasses\'>",
":(", "<img src=smiles/icon_smile_angry.gif alt=\'Angry\'>",
":-D", "<img src=smiles/icon_smile_big.gif alt=\'Big smile\'>",
"%-)", "<img src=smiles/icon_smile_cool.gif alt=\'I am cool\'>",
">8-|", "<img src=smiles/icon_smile_evil.gif alt=\'Evil\'>",
":-o", "<img src=smiles/icon_smile_kisses.gif alt=\'Kiss you\'>",
"?", "<img src=smiles/icon_smile_question.gif alt=\'Question\'>",
":-(", "<img src=smiles/icon_smile_sad.gif alt=\'Sad\'>",
"[$-)", "<img src=smiles/icon_smile_sleepy.gif alt=\'Sleepy\'>",
":-P", "<img src=smiles/icon_smile_tongue.gif alt=\'Tongue\'>",
";-)", "<img src=smiles/icon_smile_wink.gif alt=\'Wink\'>"
);
for ($i=0;$i<sizeof($format_smilies);$i=$i+2) {
$message = str_replace($format_smilies[$i], $format_smilies[$i+1], $message);
}
}
$this->result = mysql_query("INSERT INTO $this->table (name, email, message, date, country) VALUES ('$name', '$email', '$message', NOW(), '$country')");
// When guestbook is signed a message is emailed
// to webmaster if this feature is enabled;
if (strlen($webmaster) <> 0) {
$sendmessage = "Name: " . $name . "\nEmail: " . $email . "\nMessage: " . $message;
@mail($webmaster, "Guestbook signed", $sendmessage);
}
if (!$this->result)
echo "Error!";
}
/* DISCONNECT FROM DATABASE */
function disconnect_db()
{
mysql_close($this->dbc);
}
}
/******************************************************************************/
/* END OF GUESTBOOK CLASS */
/******************************************************************************/
/******************************************************************************/
/* INSTALLATION: */
/* 1) create a table in the MYSQL database with a query: */
/* CREATE TABLE guestbook ( */
/* id int(5) NOT NULL auto_increment, */
/* name varchar(50), */
/* email varchar(50), */
/* message text, */
/* date datetime, */
/* PRIMARY KEY (id) */
/* ) */
/* 2) define some variables below as they suit your environment; */
/* 3) possibly change any formatting in the display_records() function; */
/* 4) copy gb.php to your server and enjoy; */
/******************************************************************************/
// Let's define some variables;
$webmaster = ''; // EMAIL ADDRESS TO SEND WARNINGS TO
// WHEN GUESTBOOK IS SIGNED; LEAVE
// EMPTY IF YOU WANT THIS FEATURE
// DISABLED;
$server = 'localhost'; // DATABASE SERVER;
$database = 'test'; // DATABASE NAME;
$user = 'root'; // USER TO CONNECT TO DATABASE;
$password = ''; // USER PASSWORD;
$entries_per_page = 5; // HOW MANY RECORDS PER PAGE;
$message_length = 1024; // MESSAGE LENGTH ALLOWED, LEAVE 0
// IF YOU WANT ANY SIZE MESSAGES,
// THIS CUTS MESSAGE TO DEFINED SIZE;
$language_filter = 1; // 1 - enable language filter;
// 0 - disable language filter;
$bad_words = array ( // Bad words vocabulary (add your own);
'bottom', 'trousers'
);
// Let's spawn an instance of guestbook class;
$myGB = new Guestbook;
$myGB->connect_db($server, $database, $user, $password);
// aw- put the POST variables into the variables used in the script
$message = $_POST['message'];
$email = $_POST['email'];
$name = $_POST['name'];
$smilies = $_POST['smilies'];
$country = $_POST['country'];
// If user submitted form, add a record;
if (isset($message)) {
if (!isset($smilies))
$myGB->add_record($name, $email, $message, "no", $webmaster, $message_length, $language_filter, $bad_words, $country);
else
$myGB->add_record($name, $email, $message, $smilies, $webmaster, $message_length, $language_filter, $bad_words, $country);
}
// If opened without $offset variable defined, it is zero;
if ((!isset($offset)) or ($offset < 0) or (!is_numeric($offset))) $offset = 0;
$myGB->display_records($offset, $entries_per_page);
$myGB->disconnect_db();
?>
<div align=center>
<table border=0 cellspacing=10 cellpadding=10 width=85% align=center>
<tr>
<td valign=top align=center width=60%>
<p><strong>Add your message:</strong><br>
(*) Required fields
<form name=myGB action=gb.php method=post>
* Name:<br><input type='text' name='name' maxlength=30><br>
Email:<br><input type='text' name='email' maxlength=30><br>
* Message:<br><textarea name='message' rows=10 cols=30></textarea><br>
Country:<br><input type='text' name='country' maxlength=30></input><br>
<input type=checkbox name='smilies' value='on' checked> Use image smilies<br><br>
<input type=button value=' Leave message ' onClick="javascript:checkGB();">
</form>
</td>
<td valign=top width=40%>
<b>Smilies:</b><br><br>
<table border=1 cellpadding=5>
<tr><td>
<img src=smiles/icon_smile.gif alt='Smile'> :-)
</td><td>
<img src=smiles/icon_smile_8ball.gif alt='Glasses'> 8-)
</td><td>
<img src=smiles/icon_smile_angry.gif alt='Angry'> :(
</td></tr><tr><td>
<img src=smiles/icon_smile_big.gif alt='Big smile'> :-D
</td><td>
<img src=smiles/icon_smile_cool.gif alt='I am cool'> %-)
</td><td>
<img src=smiles/icon_smile_evil.gif alt='Evil'> >8-|
</td></tr><tr><td>
<img src=smiles/icon_smile_kisses.gif alt='Kiss you'> :-o
</td><td>
<img src=smiles/icon_smile_question.gif alt='Question'> ?
</td><td>
<img src=smiles/icon_smile_sad.gif alt='Sad'> :-(
</td></tr><tr><td>
<img src=smiles/icon_smile_sleepy.gif alt='Sleepy'> [$-)
</td><td>
<img src=smiles/icon_smile_tongue.gif alt='Tongue'> :-P
</td><td>
<img src=smiles/icon_smile_wink.gif alt='Wink'> ;-)
</td></tr></table>
</td>
</tr>
</table>
</div>
</body>
</html>Second challenge:
If you don't know about Regular Expression, go to http://www.regular-expressions.info/tutorial.html to get better understanding how Regular Expression works.
PHP has a function that performs a regular expression match called preg_match.
The challenge is to check whether the number entered is a valid Australian number and whether it's a mobile or land line number.
Regular expression for valid Australian phone number can be found on http://regexlib.com/REDetails.aspx?regexp_id=66. You can also copy the regex from the code below.
<?php
if(!empty($_GET['phone']))
{
 $pattern = '/(^1300\d{6}$)|(^1800|1900|1902\d{6}$)|(^0[2|3|7|8]{1}[0-9]{8}$)|(^13\d{4}$)|(^04\d{2,3}\d{6}$)/';
 $subject = $_GET['phone'];
 if(preg_match($pattern, $subject)>0)
 {
  echo "Your phone number is Australian.";
  if(substr($subject,0,2) == "04")
   echo " It's a mobile phone";
  else
   echo " It's a land line / premium number.";
 }
 else
  echo "Not an Australian number";
}

?>
<!DOCTYPE html PUBLIC "-//W3C//DTD XHTML 1.0 Transitional//EN"
 "http://www.w3.org/TR/xhtml1/DTD/xhtml1-transitional.dtd">

<html xmlns="http://www.w3.org/1999/xhtml" xml:lang="en" lang="en">
<head>
 <meta http-equiv="Content-Type" content="text/html; charset=utf-8"/>

 <title>Phone REGEX</title>

</head>
<body>
<form name="form1" action="phone.php" method="get">
<input type="text" name="phone"/>
<input type="submit" name="submit" value="Press me" />
</form>
</body>Tuesday, September 7, 2010
Week 6 Practical Exercise (Challenge Only)
Challenge week 6 is about CSS layout.
To get the same result is impossible, but I guess I do it OK.
Below is the code...
To get the same result is impossible, but I guess I do it OK.
Below is the code...
<!DOCTYPE html PUBLIC "-//W3C//DTD XHTML 1.0 Strict//EN"
"http://www.w3.org/TR/xhtml1/DTD/xhtml1-strict.dtd">

<html xmlns="http://www.w3.org/1999/xhtml" xml:lang="en" lang="en">

<head>
<meta http-equiv="Content-Type" content="text/html; charset=utf-8" />
<title>Week 6's Challenge</title>
<style type="text/css">
<!--
#right-insert
{
    float:right;
 background-color: #909090;
    font-size: 35px;
    color: #ED4623;
    padding: 10px 2px 10px 5px;
 text-align:justify;
    width: 190px;
 font-family: "Times New Roman", sans-serif;
 letter-spacing: 1px;
    margin-right: 500px;
}
p
{
 margin-right: 600px;
 text-align:justify;
}
-->
</style>
</head>
<body>
<p>
Lorem ipsum dolor sit amet, consectetur adipiscing elit. Maecenas sem sapien, bibendum ut tincidunt sit amet, dapibus a augue. Vivamus iaculis malesuada velit sit amet euismod. Integer feugiat nisi at enim mattis at feugiat libero pretium. Nunc porta porttitor varius. Vivamus non felis quis magna bibendum varius. Class aptent taciti sociosqu ad litora torquent per conubia nostra, per inceptos himenaeos. Vivamus tincidunt justo dictum nisi fermentum ut facilisis libero ultrices. Maecenas lobortis interdum magna, sed convallis felis convallis eget. Cum sociis natoque penatibus et magnis dis parturient montes, nascetur ridiculus mus. Morbi tincidunt purus sit amet neque suscipit tempor. Nunc sem eros, ullamcorper nec pulvinar nec, placerat bibendum lorem.
</p>
<div id="right-insert">
this is some text in a box text text text text
</div>
<p>
Lorem ipsum dolor sit amet, consectetur adipiscing elit. Maecenas sem sapien, bibendum ut tincidunt sit amet, dapibus a augue. Vivamus iaculis malesuada velit sit amet euismod. Integer feugiat nisi at enim mattis at feugiat libero pretium. Nunc porta porttitor varius. Vivamus non felis quis magna bibendum varius. Class aptent taciti sociosqu ad litora torquent per conubia nostra, per inceptos himenaeos. Vivamus tincidunt justo dictum nisi fermentum ut facilisis libero ultrices. Maecenas lobortis interdum magna, sed convallis felis convallis eget. Cum sociis natoque penatibus et magnis dis parturient montes, nascetur ridiculus mus. Morbi tincidunt purus sit amet neque suscipit tempor. Nunc sem eros, ullamcorper nec pulvinar nec, placerat bibendum lorem.
</p>
</body>
</html>Wednesday, September 1, 2010
Week 5 Practical Exercise (Challenge only).
The practical exercise is quite easy so I just went straight to the challenge
The challenge:
I decided to divide the challenge into 2 sections:
1. Making the post get bigger (easiest)
2. Make the contents of the posts appear only when you hover the mouse over the title. (the trickiest one)
And, I was a bit stuck with the second one, but finally got it after Googling.
1. For the first challenge, it is pretty straightforward. The workflow is when you hover the ".entry" class, you get bigger font-size. The CSS code:
2. For the second challenge, we have to use the indirect sibling selector to get the effect that we want. The CSS code:
The challenge:
If you have time at the end, experiment with the :hover pseudo-class to make the page interactive. Make the text of a post get bigger if you hover over it. Make the contents of the posts appear only when you hover the mouse over the title.I decided to divide the challenge into 2 sections:
1. Making the post get bigger (easiest)
2. Make the contents of the posts appear only when you hover the mouse over the title. (the trickiest one)
And, I was a bit stuck with the second one, but finally got it after Googling.
1. For the first challenge, it is pretty straightforward. The workflow is when you hover the ".entry" class, you get bigger font-size. The CSS code:
.entry:hover
{
 font-size:30px; /*You can change the size to whatever you want*/
}
2. For the second challenge, we have to use the indirect sibling selector to get the effect that we want. The CSS code:
p
{
 visibility: hidden; /*set default p as hidden*/
}

h2:hover ~ p
{
 visibility: visible; /*when you hover h2, you will get p visible (as well)*/
}
Monday, August 30, 2010
CSS Sprites
The first time I saw these two words on Best Practices for Speeding Up Your Website, I asked myself, "How come does Sprite relate to CSS?"
I found the definition of it:
I didn't really understand immediately what it means.
I'm really amazed when I understand it. This is genius way to reducing image requests.
Basically, it's like this. For example, you want to make an "on-off" effect of your image. So when you drag your mouse over, the image link goes "on", and "off" if you drag your mouse off the image. Without sprites, usually we have to make 2 images = 1 "on" image + 1 "off" image. So, the way it works is that "when you drag your mouse over, the browser loads the "on" image, and when you drag your mouse off the image, the browser loads the "off" image.
On the other hand, when using sprites, you just need 1 image, which is a combination between "on" and "off" images (which are drawn side-by-side). So, the way it works: the browser have already loaded the image ("on" and "off" combined in 1 image file) when it loads the page, but the CSS only shows the "off" image (using background-position properties). When you drag the mouse over the image link, the position is changed to the "on" image position.
If you don't understand my explanation (hehehehe...) or you want to see the examples and more details, go to these sites:
http://css-tricks.com/css-sprites/
http://www.thewebsqueeze.com/web-design-articles/an-introduction-to-css-sprites.html
I found the definition of it:
CSS Sprites are the preferred method for reducing the number of image requests. Combine your background images into a single image and use the CSS background-image and background-position properties to display the desired image segment
I didn't really understand immediately what it means.
I'm really amazed when I understand it. This is genius way to reducing image requests.
Basically, it's like this. For example, you want to make an "on-off" effect of your image. So when you drag your mouse over, the image link goes "on", and "off" if you drag your mouse off the image. Without sprites, usually we have to make 2 images = 1 "on" image + 1 "off" image. So, the way it works is that "when you drag your mouse over, the browser loads the "on" image, and when you drag your mouse off the image, the browser loads the "off" image.
On the other hand, when using sprites, you just need 1 image, which is a combination between "on" and "off" images (which are drawn side-by-side). So, the way it works: the browser have already loaded the image ("on" and "off" combined in 1 image file) when it loads the page, but the CSS only shows the "off" image (using background-position properties). When you drag the mouse over the image link, the position is changed to the "on" image position.
If you don't understand my explanation (hehehehe...) or you want to see the examples and more details, go to these sites:
http://css-tricks.com/css-sprites/
http://www.thewebsqueeze.com/web-design-articles/an-introduction-to-css-sprites.html
YSlow (Speeding Up Your Website)
When I was searching on Google how to strip unused CSS codes, I found the Best Practices for Speeding Up Your Website. Go to the link I've given to read further details about how to tweak your website :D

There are 35 best practices that can be done for boosting your website, but, you don't have to worry of how you're gonna apply these practices, because Yahoo have created a tool called YSlow which is a Firefox add-on integrated with the Firebug web development tool, so you need to install Firebug first before YSlow. Below image shows the result page of YSlow.

It is a great tool to review your website performance. However, for those who use free web hosting, you're not allowed to modify the settings of the server. Hence, you might not get the best result when using YSlow.
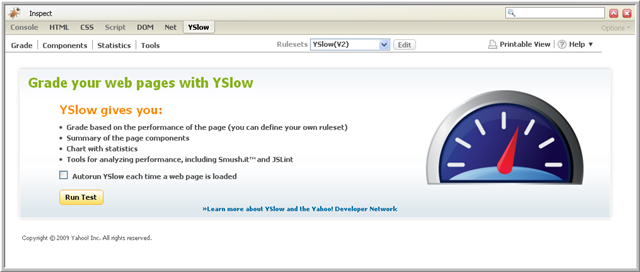
Tuesday, August 24, 2010
Technologies Choice For My Learning Contract
Basically, my technologies choice for my learning contract can be categorized as:
Front-end technologies: XHTML, CSS, Javascript, jQuery 1.4.
Back-end technologies: PHP, MySQL.
Web Server: Apache
Since this week's subject material is about server side technologies, let's take a look on what PHP is.
PHP (recursive acronym for PHP: Hypertext Preprocessor) is a widely-used open source general-purpose scripting language that is especially suited for web development and can be embedded into HTML.
What distinguishes PHP from something like client-side JavaScript is that the code is executed on the server, generating HTML which is then sent to the client. The client would receive the results of running that script, but would not know what the underlying code was. You can even configure your web server to process all your HTML files with PHP, and then there's really no way that users can tell what you have up your sleeve.
The best things in using PHP are that it is extremely simple for a newcomer, but offers many advanced features for a professional programmer.
There are three main areas where PHP scripts are used.
1. Server-side scripting. This is the most traditional and main target field for PHP. You need three things to make this work. The PHP parser (CGI or server module), a web server and a web browser. You need to run the web server, with a connected PHP installation. You can access the PHP program output with a web browser, viewing the PHP page through the server. All these can run on your home machine if you are just experimenting with PHP programming.
2. Command line scripting. You can make a PHP script to run it without any server or browser. You only need the PHP parser to use it this way. This type of usage is ideal for scripts regularly executed using cron (on *nix or Linux) or Task Scheduler (on Windows). These scripts can also be used for simple text processing tasks.
3. Writing desktop applications. PHP is probably not the very best language to create a desktop application with a graphical user interface, but if you know PHP very well, and would like to use some advanced PHP features in your client-side applications you can also use PHP-GTK to write such programs. You also have the ability to write cross-platform applications this way. PHP-GTK is an extension to PHP, not available in the main distribution.
Reference(s):
http://www.php.net
http://en.wikipedia.org/wiki/PHP
Week 4 Practical Exercise
Week 4 materials are about server-side technologies, which focus on PHP.
For the exercise, we're gonna use date function on PHP. If you want to see the documentation without going online, just download the documentation here
Don't hesitate to click Read More.
Date function
string date ( string $format [, int $timestamp ] )
Returns a string formatted according to the given format string using the given integer timestamp or the current time if no timestamp is given. In other words, timestamp is optional and defaults to the value of time().
Original file week4prac.php
The output for the code above: The date is: 24 08 2010 13:29:35
To get 'Monday 15th of August 2005 03:12:46 PM' as the output <-- (not the exact date) Change line 15 to
For the question of what sort of online database administration system is provided by my webhost (which is 000webhost.com), it is PhpMyAdmin.
For the exercise, we're gonna use date function on PHP. If you want to see the documentation without going online, just download the documentation here
Don't hesitate to click Read More.
Date function
string date ( string $format [, int $timestamp ] )
Returns a string formatted according to the given format string using the given integer timestamp or the current time if no timestamp is given. In other words, timestamp is optional and defaults to the value of time().
Original file week4prac.php
<!DOCTYPE html PUBLIC "-//W3C//DTD XHTML 1.0 Strict//EN"
 "http://www.w3.org/TR/xhtml1/DTD/xhtml1-strict.dtd">

<html xmlns="http://www.w3.org/1999/xhtml" xml:lang="en" lang="en">
<head>
 <meta http-equiv="Content-Type" content="text/html; charset=utf-8"/>

 <title>Week 4 Practical</title>

</head>

<body>
<?php
echo "The date is: ";
echo date("d m Y H:i:s");

?>

</body>
</html>
The output for the code above: The date is: 24 08 2010 13:29:35
To get 'Monday 15th of August 2005 03:12:46 PM' as the output <-- (not the exact date) Change line 15 to
echo date("l jS \of F Y h:i:s A");For the question of what sort of online database administration system is provided by my webhost (which is 000webhost.com), it is PhpMyAdmin.
Tuesday, August 17, 2010
Week 3 Practical Exercise
This blog post was made to point the interesting parts of the exercises given on week 3.
To see fullpost, don't hesitate to click "Read More" :D
Exercise 1
- What's the difference between <strong> and <b> ?
=> Doing this exercise makes me know the answer
Exercise 3
I've actually installed Web Developer add-ons years ago but never use it. I've just realized that it's REALLY a great tool.
I skipped exercise 2 & 4 because it's fairly easy. For exercise 4, I think it's a good exercise that shows how to modifying DOM using raw Javascript (without framework). However, if it's easier to use jQuery to accessing harder structured DOM.
To see fullpost, don't hesitate to click "Read More" :D
Exercise 1
- What's the difference between <strong> and <b> ?
=> Doing this exercise makes me know the answer
Use the <strong> and <em> tags when the content of your page requires that certain words or phrases be stressed. Use them sparingly or your page, much as you would use exclamation points ( ! ! ! ). If you are only highlighting words for a visual effect to assist in navigation use the <b> and <i> tags (http://www.think-ink.net/html/bold.htm).


One way of working out what is semantically most appropriate is to imagine what a screen reader would do. It will read a <b> tag in a normal voice, but it will emphasise a <strong> tag with a "bigger" voice. So now we know what each tag means. (http://www.webmasterworld.com/forum21/9181.htm)
Exercise 3
I've actually installed Web Developer add-ons years ago but never use it. I've just realized that it's REALLY a great tool.
– CSS > View Style Information. This is like an "Inspect Element" in Chrome.

- CSS > Edit CSS. This menu will let you edit the CSS on-the-fly.

- Information > Display Block size. This menu will let you know dimensions (block size) for div, form, etc

- Tools > Validate CSS. A shortcut to validate your CSS code using the W3C CSS validation service.

- Tools > Display page validation. Another cool feature that automatically validates your html code. If you change your HTML on-the fly using web-developer, it will validate your code straightaway after you finish editing.
I skipped exercise 2 & 4 because it's fairly easy. For exercise 4, I think it's a good exercise that shows how to modifying DOM using raw Javascript (without framework). However, if it's easier to use jQuery to accessing harder structured DOM.
Wednesday, August 11, 2010
Fix failed 000webhost.com validation
If you're failed to validate your 000webhost.com, it is probably because of the generated analytic code that is used "to monitor if account active or not. Analytics code is also used to build stats and visitors report for your website. By disabling analytics code you will also loose an ability to get stats for your website."
To fix it,
1. Go to http://members.000webhost.com/analytics.php
2. Enter your domain (ex. test.site90.net)
3. Enter your ftp password.
4. Don't forget to choose "Disable Code" below "Manage Analytic" dropdown.
To fix it,
1. Go to http://members.000webhost.com/analytics.php
2. Enter your domain (ex. test.site90.net)
3. Enter your ftp password.
4. Don't forget to choose "Disable Code" below "Manage Analytic" dropdown.
Blogger W3C Validation Fail
OMG !!! I'm surprised when I validate my blog.
137 errors and 20 warning(s). Insane.

Referring to Vikas Gupta's blog (bloggingtips), Blogger have had this problem since they still used XHTML for the templates. Even though, it has smaller number than before (probably because now they use HTML5), but I think the number is still huge.
I've tested some Wordpress websites and they have less errors. Click the links below to see the result yourself:
http://validator.w3.org/check?verbose=1&uri=http://www.kombitz.com/
http://validator.w3.org/check?verbose=1&uri=/http://notdrowning.wordpress.com/
http://validator.w3.org/check?verbose=1&uri=http://bestblog.wordpress.com/
There are some steps to fix invalid xhtml template that are suggested on Kaylan-City's blog.
The website also points out some problems that can only be fixed by Google team such as Blog's Search Result String '&max-results=20' Error and Navbar's Validation Error
So, what's the solution? Migrate to Wordpress ?
References:
http://kalyan-city.blogspot.com/2008/08/w3c-validating-blogger-xhtml-template.html
http://www.bloggingtips.com/2010/03/21/official-google-blogs-and-blogger-are-full-of-validation-errors/
http://blog.tomw.net.au/2010/05/removing-validation-errors-from-google.html
Friday, August 6, 2010
Modify the code tag
Basically, I've been using <code> tag for links, descriptions, etc. <pre> tag (just added recently) is used for the programming code :D
For this blog, I use this css code below for my <code> tag:
For this blog, I use this css code below for my <code> tag:
code{
color: black;
padding: 4px 10px 0px 40px;
line-height:20px;
/*--Background of lined paper--*/
background:url(https://blogger.googleusercontent.com/img/b/R29vZ2xl/AVvXsEjhPHoLcc0a8-N-kODqjcmvJ97OlshJFoz-Fx_bJV5qEye9odIn86IhQImVDC7j4-0wrctLM1033a4qkSRVahsoXp9jxmq68y4LDDskfgLxB5RaOH2RwJsJHYv8mKIks_8Nl5AIpJIa9TYG/) repeat-y left top;
white-space: no-wrap;
display: block; /* -- this make the background wraps the text correctly */
}
Added "Read More" (again)
Reference: http://bloggerstop.net/2008/10/blogger-help-add-read-more-link-to-your.html
Click Read More to see the steps
Steps to follow:
1. Log into the Blogger.com account
2. Go to "Layout" section
3. Back up your current template, by downloading it.
4. Now click on "Expand Widget Templates"
5. Now find this code - ]]>
6. Just AFTER that code add these lines
7. Now again find this code :
8. And just after this, add these code lines:
If you want to shift the "Read More!" text to the extreme-right side, use this code:
Click Read More to see the steps
Steps to follow:
1. Log into the Blogger.com account
2. Go to "Layout" section
3. Back up your current template, by downloading it.
4. Now click on "Expand Widget Templates"
5. Now find this code - ]]>
6. Just AFTER that code add these lines
<style>
<b:if cond='data:blog.pageType == "item"'>
span.fullpost {display:inline;}
<b:else/>
span.fullpost {display:none;}
</b:if>
</style>
7. Now again find this code :
8. And just after this, add these code lines:
<!--READ-MORE-STARTS--><b:if cond='data:blog.pageType != "item"'>
<a expr:href='data:post.url'>Read More!</a>
</b:if><!--READ-MORE-STOPS-->
If you want to shift the "Read More!" text to the extreme-right side, use this code:
<!--READ-MORE-STARTS--><b:if cond='data:blog.pageType != "item"'>
<a expr:href='data:post.url'><div style="text-align: right;">Read More !</div></a>
</b:if><!--READ-MORE-STOPS-->
9. Now save the template.
Thursday, August 5, 2010
Syntax Highlighter (+Demo)
I've added Syntax Highlighter for some programming codes. Go to http://alexgorbatchev.com/SyntaxHighlighter/ to get the latest version.
Reference: http://blog.cartercole.com/2009/10/awesome-syntax-highlighting-made-easy.html
Demo:
Yeepee, it's working. Latest version removes the clipboard Flash.
Steps to install it:
1. Paste this code just before the </head> tag. Remove the languages you don't want to use :
Reference: http://blog.cartercole.com/2009/10/awesome-syntax-highlighting-made-easy.html
Demo:
public class HelloBlogger {
public static void main(String [] args) {
System.out.println("Hello Blogger!!");
}
}
Yeepee, it's working. Latest version removes the clipboard Flash.
Steps to install it:
1. Paste this code just before the </head> tag. Remove the languages you don't want to use :
<link href='http://alexgorbatchev.com/pub/sh/current/styles/shCore.css' rel='stylesheet' type='text/css'/>
<link href='http://alexgorbatchev.com/pub/sh/current/styles/shThemeDefault.css' rel='stylesheet' type='text/css'/>
<script src='http://alexgorbatchev.com/pub/sh/current/scripts/shCore.js' type='text/javascript'></script>
<script src='http://alexgorbatchev.com/pub/sh/current/scripts/shBrushCpp.js' type='text/javascript'></script>
<script src='http://alexgorbatchev.com/pub/sh/current/scripts/shBrushCSharp.js' type='text/javascript'></script>
<script src='http://alexgorbatchev.com/pub/sh/current/scripts/shBrushCss.js' type='text/javascript'></script>
<script src='http://alexgorbatchev.com/pub/sh/current/scripts/shBrushJava.js' type='text/javascript'></script>
<script src='http://alexgorbatchev.com/pub/sh/current/scripts/shBrushJScript.js' type='text/javascript'></script>
<script src='http://alexgorbatchev.com/pub/sh/current/scripts/shBrushPhp.js' type='text/javascript'></script>
<script src='http://alexgorbatchev.com/pub/sh/current/scripts/shBrushPython.js' type='text/javascript'></script>
<script src='http://alexgorbatchev.com/pub/sh/current/scripts/shBrushRuby.js' type='text/javascript'></script>
<script src='http://alexgorbatchev.com/pub/sh/current/scripts/shBrushSql.js' type='text/javascript'></script>
<script src='http://alexgorbatchev.com/pub/sh/current/scripts/shBrushVb.js' type='text/javascript'></script>
<script src='http://alexgorbatchev.com/pub/sh/current/scripts/shBrushXml.js' type='text/javascript'></script>
<script src='http://alexgorbatchev.com/pub/sh/current/scripts/shBrushPerl.js' type='text/javascript'></script>
<script language='javascript'>
SyntaxHighlighter.config.bloggerMode = true;
SyntaxHighlighter.config.clipboardSwf = 'http://alexgorbatchev.com/pub/sh/current/scripts/clipboard.swf';
SyntaxHighlighter.all();
</script>
2. Now you are all done to start posting source codes. You can either use the <pre> to enclose your source-codes, attribute and class="brush:java" for your java source.
Cleaning up my blog.
After several months, I visit my blog to clean it up (no more ads, new template). Why? Because, there will be more visitors to come to visit my blog ( I have faith on it ) :D I need to impress them ^^
Question: Why a new label/category appears?
Answer: This blog will also be used for one of assessment criteria for Digital Media Technologies subject. I want to make sure that it looks tidy and clean.
Because of the new template I use, I need to fix the "Read More" and <code> tag problems because they got deleted (darn it).
So, this post is a border and a beginning of my last semester at UTS :D
Wednesday, April 21, 2010
Macbook Screen Models List
Below is a list of Macbook screen models. It's useful when you want to replace your Macbook screen by yourself. This list especially useful for 13.3" Macbooks (Source: many)
9C84 = LG/Philips LP154WP3-TLA1 (15" MacBook Pro)
9C85 = Chi Mei N154C6-L04 (15" MacBook Pro)
Older
9C89 = LG/Philips LP133WX2-TLC1 (MacBook UniBody)
9C8C - AU Optronics B133EW04 V0
9C9F - LP133WX3-TLA1
Newer
9CA0 - Chi Mei NI33I6-L06 (MBP 13" 2.26 Ghz)
9CA1 - AU Optronics B133EW07 V0 (MBP 13")
9CA5 - LG/Philips LP133WX-TLC5
9CA6 - Samsung LTN133AT09
9CA7 - Chi Mei N133I6-L08
9CA8 - AU Optronics B133EW04 V3
Monday, February 8, 2010
Sunday, February 7, 2010
Kingsford & Soekarno-Hatta Airport
My first experience traveling alone after long time waiting. The key is a notebook to write a checklist so you won't forget any important things you need to bring. This post is a reminder for my next trip. In this trip, I got a tax refund for my new Macbook :D. More about TRS, click here
I travelled with Garuda (Airbus A330-200) on Jan 2010.
I travelled with Garuda (Airbus A330-200) on Jan 2010.
This was my checklist on my waist bag:
1. passport
2. ticket
3. invoice (if you want to claim TRS)
4. the notepad
5. pen
6. Indo arrival card (if you forget to bring it, I think you can ask the flight attendant when you're in the plane. Garuda flight attendants offer you the card. The departure and arrival card are side by side.)
7. copy of visa (electronic visa has a drawback here)
Check-in baggage:
1. laptop and mobile phone charger
2. toiletries (towel, hair gel, razor, tooth brush, tooth paste)
3. power adapter converter (Australian and Indo have different types of adapter, but they have same voltage range)
4. sandal, shoes
5. clothes (and undies, of course)
Departure from Kingsford Sydney International Airport
1. Find your flight check-in counter on a board that shows gate numbers. The counter is usually opened 3 hours before departure.
2. Get your passport, visa, and ticket ready to get your boarding pass on the check-in counter. Don't forget to take the outgoing passenger card (on the check-in counter desk). If you forget, ask the guide near the custom entrance.
3. The custom entrance is near the DutyFree shop. Get your passport, filled outgoing passenger card and boarding pass ready when you go to custom.
4. (optional) To claim your TRS, go to the TRS counter (the place is near the toilet, very weird). Get your passport, boarding pass, the items, and the invoice of your items. You can collect your refund through one of the following methods:
   * cheque
   * credit to an Australian bank account
   * payment to a credit card or debit card
5. Find your waiting gate on a board.
Arrival at Soekarno-Hatta
1. In the plane, fill your arrival card and declaration card. Most of the time, just tick "No" to all the boxes, cause the custom is not too strict as Australian custom
2. From plane, go to custom with your passport and arrival card in hand.
3. Take your baggage.
Departure from Soekarno-Hatta)
1. Find your flight check-in counter on a board that shows gate numbers. The counter is usually opened 2 hours before departure.
2. Get your passport, visa, and ticket ready to get your boarding pass on the check-in counter. And also Rp. 150,000 for airport tax.  The check-in staff will give you departure card.
3. The fiscal counter is on the left side (when facing the check in counter). Get your passport ready (and "Kartu Keluarga" and "NPWP" to get your fiscal fee waived (Indo only)). (I'm a student and I've already got my passport attached with the address in Australia, so it's free)
4. Go to fiscal check counter (on the left side as well). Get your passport and fiscal payment proof (if you pay).
5. Go to custom (after fiscal check counter). Get your passport, filled departure card & arrival card (if separated) to be stamped by the custom staff. (got a story here. my friend got his passport "denied" = "dicekal", because he has only his first name and it's a common name, so the custom said that it was probably because the computer detects a couple names that are same with his.)
6. Find your gate on a display board, and waiting for the plane.
Arrival at Kingsford
1. In the plane, fill your incoming passenger card. The most important items that are usually checked are medicine and food. Tick those boxes with Yes (if you bring it). The least important item is "Goods obtained overseas and...). Explanation next.
2. From plane, go to custom with your passport and incoming passenger card in hand.
3. The most tricky part. "Declaration".
story: I brought my TRS-claimed-Macbook back and I checked "No" on the card. The laptop was on my backpack and the food & medicine were in my check-in baggage. On the first layer of custom, I was asked about the use of my medicine and what food I brought. Here, I didn't have to open my baggage. On the 2nd layer, I needed to show the food. They are only some bags of tomato ketchup. That's all. No question about what was on my backpack, although they scanned my backpack as well).
4. That's all folks.
Saturday, January 9, 2010
[Tutorial] Fixing the internal mic Macbook 13" Late 2009 on Windows 7
Update: By installing Boot Camp 3.1, you don't need to apply this fix
Tutorials Index
1. Installing Windows 7 using Boot Camp (OS X 10.6 & Macbook 13" Late 2009 Unibody). This only installs 2 partitions which are Mac and Windows partition respectively.
2. Installing Windows 7 without using Boot Camp (OS X 10.6 & Macbook 13" Late 2009 Unibody). This doesn't mean not to use Boot Camp at all. We still need to install Boot Camp for drivers in Windows. This tutorial will explain how to make 2 Windows partitions using Disk Utility in Mac OS X 10.6.
3. Installing Wireless (WiFi) Driver in Windows 7 on Macbook 13" Late 2009 Unibody
4. Fixing slow booting in Windows 7 on Macbook 13" Late 2009 Unibody
5. Fixing the internal mic Macbook 13" Late 2009 on Windows 7
The steps are similar to [Tutorial] Installing Wireless LAN (WiFi) Driver in Windows 7 on Macbook 13" Late 2009 Unibody except the file that would be installed.
1. Insert the OS 10.6 install CD
2. Right click on the DVD in My Computer, and select Open
3. Browse to Boot Camp> Drivers> Cirrus
4. Right-click on CirrusAudioXP and select Troubleshoot compatibility
5. Select Troubleshoot program
6. Select The program worked in earlier version of Windows.. and click Next
7. Select Windows Vista and click Next
8. Click Start the Program
9. In the taskbar, click on the shield, and then select Yes
10. The Device Driver Installation Wizard will open - click Next
11. Select I accept the agreement, and click Next
12. The installation wizard will complete, and the wireless drivers will install
13. From the Program compatibility window, click Next and select yes save these settings for this program
Friday, January 8, 2010
[Tutorial] Fixing slow booting in Windows 7 on Macbook 13" Late 2009 Unibody
Tutorials Index
1. Installing Windows 7 using Boot Camp (OS X 10.6 & Macbook 13" Late 2009 Unibody). This only installs 2 partitions which are Mac and Windows partition respectively.
2. Installing Windows 7 without using Boot Camp (OS X 10.6 & Macbook 13" Late 2009 Unibody). This doesn't mean not to use Boot Camp at all. We still need to install Boot Camp for drivers in Windows. This tutorial will explain how to make 2 Windows partitions using Disk Utility in Mac OS X 10.6.
3. Installing Wireless (WiFi) Driver in Windows 7 on Macbook 13" Late 2009 Unibody
4. Fixing slow booting in Windows 7 on Macbook 13" Late 2009 Unibody
5. Fixing the internal mic Macbook 13" Late 2009 on Windows 7
If you got your Windows 7 boot time slow, maybe it's because your license is not a correct one. So as to detour this problem, you can use the SLIC(Software Licensing Description Table) v2.1 with virtual BIOS.
To fix it:
Notes:
Reference: http://www.dslreports.com/forum/r22969889-OS-X-Bootcamp-Windows-7-Ultra-Slow-Boot~start=20
1. Installing Windows 7 using Boot Camp (OS X 10.6 & Macbook 13" Late 2009 Unibody). This only installs 2 partitions which are Mac and Windows partition respectively.
2. Installing Windows 7 without using Boot Camp (OS X 10.6 & Macbook 13" Late 2009 Unibody). This doesn't mean not to use Boot Camp at all. We still need to install Boot Camp for drivers in Windows. This tutorial will explain how to make 2 Windows partitions using Disk Utility in Mac OS X 10.6.
3. Installing Wireless (WiFi) Driver in Windows 7 on Macbook 13" Late 2009 Unibody
4. Fixing slow booting in Windows 7 on Macbook 13" Late 2009 Unibody
5. Fixing the internal mic Macbook 13" Late 2009 on Windows 7
If you got your Windows 7 boot time slow, maybe it's because your license is not a correct one. So as to detour this problem, you can use the SLIC(Software Licensing Description Table) v2.1 with virtual BIOS.
To fix it:
1. Download the program from the following links (click here to download) and extract it.

2. Run the program.

3. Choose "2. SLIC 2.1 Bios Install", then

4. Choose "1. SLIC 2.1 Default", then

5. Choose "3. SLIC 2.1 HIDDEN 2", then

6. Choose "1. SLIC 2.1 HIDDEN 2".

7. Done. You will be asked to reboot your system.
Notes:
Reference: http://www.dslreports.com/forum/r22969889-OS-X-Bootcamp-Windows-7-Ultra-Slow-Boot~start=20
After those steps, your OS might still need to be activated (tested on Win7 OEM only). To activate:

1. Run the program.

2. Choose "7. Windows 7 Activator", then

3. Choose "1. Windows 7 OEM + SLIC2.1", then

4. Choose "1. Windows 7 SLIC2.1 Activator".

5. It will take some time to finish.


For Win7 retail, try using Open 7 Activator 1.27, you can download it here. by Alvin


For those getting the 'error reinstall' message, I fixed this by assigning a drive letter to my 100MB 'System Reserved' partition in Windows 7. After you've worked the fix you can just remove the drive letter to hide the partition again. by Finn
[Tutorial] Installing Wireless LAN (WiFi) Driver in Windows 7 on Macbook 13" Late 2009 Unibody
Update: By installing Boot Camp 3.1, you don't need to apply this fix
Tutorials Index
1. Installing Windows 7 using Boot Camp (OS X 10.6 & Macbook 13" Late 2009 Unibody). This only installs 2 partitions which are Mac and Windows partition respectively.
2. Installing Windows 7 without using Boot Camp (OS X 10.6 & Macbook 13" Late 2009 Unibody). This doesn't mean not to use Boot Camp at all. We still need to install Boot Camp for drivers in Windows. This tutorial will explain how to make 2 Windows partitions using Disk Utility in Mac OS X 10.6.
3. Installing Wireless (WiFi) Driver in Windows 7 on Macbook 13" Late 2009 Unibody
4. Fixing slow booting in Windows 7 on Macbook 13" Late 2009 Unibody
5. Fixing the internal mic Macbook 13" Late 2009 on Windows 7
The steps are a bit weird but it works for 32 bit. The steps are:
For Win7 64-bit:
Tutorials Index
1. Installing Windows 7 using Boot Camp (OS X 10.6 & Macbook 13" Late 2009 Unibody). This only installs 2 partitions which are Mac and Windows partition respectively.
2. Installing Windows 7 without using Boot Camp (OS X 10.6 & Macbook 13" Late 2009 Unibody). This doesn't mean not to use Boot Camp at all. We still need to install Boot Camp for drivers in Windows. This tutorial will explain how to make 2 Windows partitions using Disk Utility in Mac OS X 10.6.
3. Installing Wireless (WiFi) Driver in Windows 7 on Macbook 13" Late 2009 Unibody
4. Fixing slow booting in Windows 7 on Macbook 13" Late 2009 Unibody
5. Fixing the internal mic Macbook 13" Late 2009 on Windows 7
The steps are a bit weird but it works for 32 bit. The steps are:
1. Insert the OS 10.6 install CD
2. Right click on the DVD in My Computer, and select Open
3. Browse to Boot Camp> Drivers> Broadcom
4. Right-click on BroadcomXPInstaller and select Troubleshoot compatibility
5. Select Troubleshoot program
6. Select The program worked in earlier version of Windows.. and click Next
7. Select Windows Vista and click Next
8. Click Start the Program
9. In the taskbar, click on the shield, and then select Yes
10. The Device Driver Installation Wizard will open - click Next
11. Select I accept the agreement, and click Next
12. The installation wizard will complete, and the wireless drivers will install
13. From the Program compatibility window, click Next and select yes save these settings for this program
14. The adapter should now install correctly, and appear under Network adapters as Broadcom 802.11n Network Adapter.
For Win7 64-bit:
1. Right click the network adapter in the device manager
2. Select update driver software.
3. Select browse my computer for driver software
4. Select let me pick from a list of device drivers on my computer. It populated a list.
5. Go down to Broadcom (not Broadcom corporation) and select Broadcom 802.11n (Broadcom). There were two that had the exact name so I can't remember which one I picked. But that seemed to do the trick.
[Tutorial] Installing Windows 7 on Macbook 13" Late 2009 without using Boot Camp
Tutorials Index
1. Installing Windows 7 using Boot Camp (OS X 10.6 & Macbook 13" Late 2009 Unibody). This only installs 2 partitions which are Mac and Windows partition respectively.
2. Installing Windows 7 without using Boot Camp (OS X 10.6 & Macbook 13" Late 2009 Unibody). This doesn't mean not to use Boot Camp at all. We still need to install Boot Camp for drivers in Windows. This tutorial will explain how to make 2 Windows partitions using Disk Utility in Mac OS X 10.6.
3. Installing Wireless (WiFi) Driver in Windows 7 on Macbook 13" Late 2009 Unibody
4. Fixing slow booting in Windows 7 on Macbook 13" Late 2009 Unibody
5. Fixing the internal mic Macbook 13" Late 2009 on Windows 7
After I installed Windows 7 using Boot Camp, I planned to make a data partition from Boot Camp partition to save all my videos, musics, etc in case I want to format my Win7 partition. I then searched on the Internet and most of the articles said that I need to backup my Win7 partition first before I can modify that partition. After several thoughts, I decided to restore my Mac partition and start again.
I got an idea to make a MS-DOS FAT32 partition between Mac partition and Boot Camp partition. But I got this error: The startup disk cannot be partitioned or restored to a single partition. The startup disk must be formatted as a single Mac OS Extended (Journaled) volume or already partitioned by Boot Camp Asisstant for installing Windows

I decided to do the following steps:
1. Installing Windows 7 using Boot Camp (OS X 10.6 & Macbook 13" Late 2009 Unibody). This only installs 2 partitions which are Mac and Windows partition respectively.
2. Installing Windows 7 without using Boot Camp (OS X 10.6 & Macbook 13" Late 2009 Unibody). This doesn't mean not to use Boot Camp at all. We still need to install Boot Camp for drivers in Windows. This tutorial will explain how to make 2 Windows partitions using Disk Utility in Mac OS X 10.6.
3. Installing Wireless (WiFi) Driver in Windows 7 on Macbook 13" Late 2009 Unibody
4. Fixing slow booting in Windows 7 on Macbook 13" Late 2009 Unibody
5. Fixing the internal mic Macbook 13" Late 2009 on Windows 7
After I installed Windows 7 using Boot Camp, I planned to make a data partition from Boot Camp partition to save all my videos, musics, etc in case I want to format my Win7 partition. I then searched on the Internet and most of the articles said that I need to backup my Win7 partition first before I can modify that partition. After several thoughts, I decided to restore my Mac partition and start again.
I got an idea to make a MS-DOS FAT32 partition between Mac partition and Boot Camp partition. But I got this error: The startup disk cannot be partitioned or restored to a single partition. The startup disk must be formatted as a single Mac OS Extended (Journaled) volume or already partitioned by Boot Camp Asisstant for installing Windows
I decided to do the following steps:
1. Resized my Mac partition and add 2 more MS-DOS FAT partitions with Disk Utility.
2. Insert the Windows 7 installation DVD and reboot.
3. Format the MS-DOS FAT partitions and then Install the Windows in the second partition.
4. The rest steps are same with the steps from my previous tutorial ([Tutorial] Installing Windows 7 on Macbook 13" Late 2009 using Boot Camp)
[Tutorial] Installing Windows 7 on Macbook 13" Late 2009 using Boot Camp
I just got a Macbook (the late 2009 one) this week and wanna use Windows 7 as my primary OS, but I want to learn to use Mac OSX 10.6 (Snow Leopard) as well. There were some problems I faced and got the solutions from reading some forums. So I wanna save the solutions & steps how to solve those problems here.
Tutorials Index
1. Installing Windows 7 using Boot Camp (OS X 10.6 & Macbook 13" Late 2009 Unibody). This only installs 2 partitions which are Mac and Windows partition respectively.
2. Installing Windows 7 without using Boot Camp (OS X 10.6 & Macbook 13" Late 2009 Unibody). This doesn't mean not to use Boot Camp at all. We still need to install Boot Camp for drivers in Windows. This tutorial will explain how to make 2 Windows partitions using Disk Utility in Mac OS X 10.6.
3. Installing Wireless (WiFi) Driver in Windows 7 on Macbook 13" Late 2009 Unibody
4. Fixing slow booting in Windows 7 on Macbook 13" Late 2009 Unibody
5. Fixing the internal mic Macbook 13" Late 2009 on Windows 7
The first one is the tutorial using Boot Camp. The reference is from here. There are some steps different from the the reference because the reference using OSX 10.5.
To install Windows 7 on your Mac using Boot Camp you will need the following:
Installing Windows 7 via Boot Camp
1. Here goes. First thing – close absolutely every open program you can. That includes those things running in the Apple Menu that you always forget about. Don’t worry about killing the Dock or Dashboard – having those running is fine.
2. Now open a Finder and navigate to Applications -> Utilities and double-click Boot Camp Assistant.

3. Click Continue on the initial Introduction screen. Ignore the fact that it doesn’t mention Windows 7 as a possible OS to install.
4. Now you have to decide how much space you want to allocate to Windows 7. You might be able to get away with going as low as 6GB, but I would highly advise against it. You’ll have almost no space left over to install software, and your page file in Windows might cause frequent crashes. I opted for 20GB, which left me with just a bit over 16GB to use after installing Windows 7.
To change the amount of space to dedicate to Windows 7, click the small divider between Mac OS X and Windows, and drag it to the left.

5. Once you’ve determined how much space you want to allocate to Windows 7, click the Partition button.

6. The partitioning itself doesn’t take particularly long. If you receive an error, proceed to step 10 of the “How to install Vista with Boot Camp” tutorial. It provides all the troubleshooting info you need to resolve partitioning issues. Once you’ve cleared up any problems, or if everything just goes smoothly, proceed with the next step in this tutorial.

7. Now insert your Windows 7 DVD and click the Start Installation button.

8. Your Mac will restart, and Windows 7 will boot. You’ll be prompted with a window asking you which partition you want to install Windows on. Select the one with BOOTCAMP in the Name column. Selecting anything else may wipe out OS X or cause serious problems. Then select the Drive options (advanced) link.

9. With the BOOTCAMP volume still selected, click the Format link.

10. Click OK.

11. And Windows 7 will begin to install. It’s a fairly boring process, so you may want to grab yourself a cup of coffee or your beverage of choice. It will reboot and you need to hold Alt/Option button to boot from Windows partition.

12. You’ll be prompted to select your language, keyboard layout etc. The rest of the Windows 7 installation process is very straight forward.
13. Insert your OS X DVD. When prompted, select Open folder to view files. Then go to Bootcamp folder and double click setup file there

14. The Boot Camp installer will launch. Click Next to begin.

15. Select I accept the terms in the license agreement and then click Next again.

16. Make sure that Apple Software Update for Windows is checked, and click Install.

17. The Boot Camp installer will do its thing, and install all the required drivers.

18. Once completed, click Finish.

19. And yet again you’ll be prompted to reboot.

Tutorials Index
1. Installing Windows 7 using Boot Camp (OS X 10.6 & Macbook 13" Late 2009 Unibody). This only installs 2 partitions which are Mac and Windows partition respectively.
2. Installing Windows 7 without using Boot Camp (OS X 10.6 & Macbook 13" Late 2009 Unibody). This doesn't mean not to use Boot Camp at all. We still need to install Boot Camp for drivers in Windows. This tutorial will explain how to make 2 Windows partitions using Disk Utility in Mac OS X 10.6.
3. Installing Wireless (WiFi) Driver in Windows 7 on Macbook 13" Late 2009 Unibody
4. Fixing slow booting in Windows 7 on Macbook 13" Late 2009 Unibody
5. Fixing the internal mic Macbook 13" Late 2009 on Windows 7
The first one is the tutorial using Boot Camp. The reference is from here. There are some steps different from the the reference because the reference using OSX 10.5.
To install Windows 7 on your Mac using Boot Camp you will need the following:
1. A Windows 7 installation DVD
2. Your OS X Snow Leopard installation DVD
4. At least 10GB of empty hard drive space on your Mac (you can probably get away with less but you’ll have almost no room to install anything other than the OS)
5. An hour if all goes well, up to 5 hours if not
6. Though not absolutely required, it’s a VERY good idea to have a complete and up to date Time Machine backup of OS X – it really came in handy for me. Because part of the process involves partitioning your drive, there’s always the distinct chance something will go wrong and everything will be wiped out.
7. Patience, possibly a great deal of it. Having a book handy will also help kill time during the partitioning, installing etc).
Installing Windows 7 via Boot Camp
1. Here goes. First thing – close absolutely every open program you can. That includes those things running in the Apple Menu that you always forget about. Don’t worry about killing the Dock or Dashboard – having those running is fine.
2. Now open a Finder and navigate to Applications -> Utilities and double-click Boot Camp Assistant.
3. Click Continue on the initial Introduction screen. Ignore the fact that it doesn’t mention Windows 7 as a possible OS to install.
4. Now you have to decide how much space you want to allocate to Windows 7. You might be able to get away with going as low as 6GB, but I would highly advise against it. You’ll have almost no space left over to install software, and your page file in Windows might cause frequent crashes. I opted for 20GB, which left me with just a bit over 16GB to use after installing Windows 7.
To change the amount of space to dedicate to Windows 7, click the small divider between Mac OS X and Windows, and drag it to the left.
5. Once you’ve determined how much space you want to allocate to Windows 7, click the Partition button.
6. The partitioning itself doesn’t take particularly long. If you receive an error, proceed to step 10 of the “How to install Vista with Boot Camp” tutorial. It provides all the troubleshooting info you need to resolve partitioning issues. Once you’ve cleared up any problems, or if everything just goes smoothly, proceed with the next step in this tutorial.
7. Now insert your Windows 7 DVD and click the Start Installation button.
8. Your Mac will restart, and Windows 7 will boot. You’ll be prompted with a window asking you which partition you want to install Windows on. Select the one with BOOTCAMP in the Name column. Selecting anything else may wipe out OS X or cause serious problems. Then select the Drive options (advanced) link.
9. With the BOOTCAMP volume still selected, click the Format link.
10. Click OK.
11. And Windows 7 will begin to install. It’s a fairly boring process, so you may want to grab yourself a cup of coffee or your beverage of choice. It will reboot and you need to hold Alt/Option button to boot from Windows partition.
12. You’ll be prompted to select your language, keyboard layout etc. The rest of the Windows 7 installation process is very straight forward.
13. Insert your OS X DVD. When prompted, select Open folder to view files. Then go to Bootcamp folder and double click setup file there
14. The Boot Camp installer will launch. Click Next to begin.
15. Select I accept the terms in the license agreement and then click Next again.
16. Make sure that Apple Software Update for Windows is checked, and click Install.
17. The Boot Camp installer will do its thing, and install all the required drivers.
18. Once completed, click Finish.
19. And yet again you’ll be prompted to reboot.
Blog Reopened
After several considerations, I need to reopen my blog to save several tips and tricks in computer related things. So I announce this blog is ACTIVE again.